AI Video Editing Tutorial: A Simple Guide for Business Owners
AI video editing tutorial can shave hours off your workflow, letting you turn a product shoot into ready‑to‑post clips in minutes.
If you sell physical products, you know the grind of filming, cutting, and polishing each clip by hand. That endless back‑and‑forth eats time and money. You’ll waste less time juggling software.
In this guide you’ll see how to let AI handle the heavy lifting, auto‑cutting, colour tweaks, and quick captions, so you focus on the story. Follow our Step‑by‑step AI video editing guide for a clear roadmap.
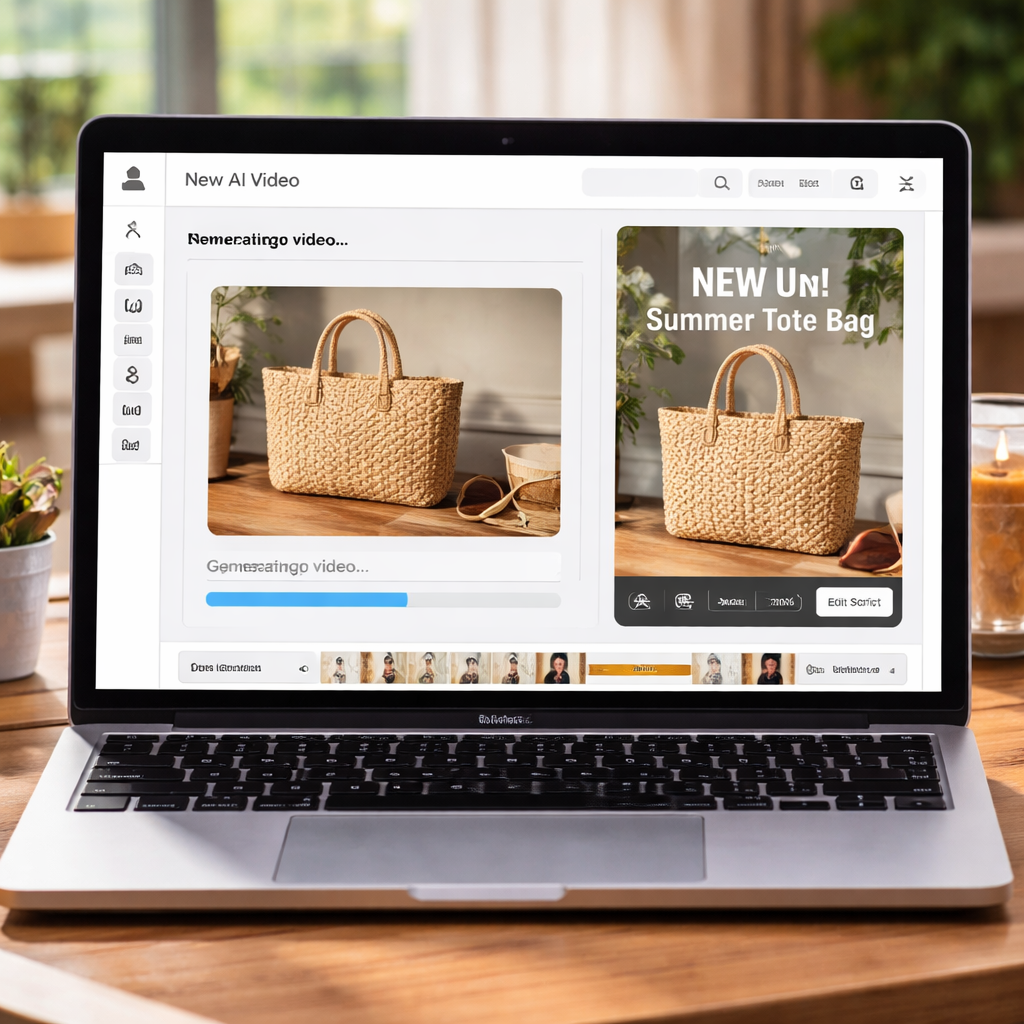
Imagine you have a 2‑minute demo video of a new kitchen gadget. With a few clicks the AI trims it to the best 30‑second showcase, adds a punchy subtitle, and outputs a ready‑to‑share file.
When you need to repurpose that clip for TikTok or Reels, a tool like Clipper Next - Turn Long Videos into Viral Shorts can instantly resize and add captions, keeping the AI‑edited flow intact.
Start by uploading your raw footage, let the AI suggest cuts, then tweak any scene you love. Export in the format your shop uses and watch engagement rise. Share the video right from the editor to your store page.
Step 1: Choose the Right AI Editing Tool
Pick the right AI editor and your whole workflow gets a boost. You stop juggling three apps and start working in one place.
First, list what you need: auto‑cut, colour fix, caption add, and a format that fits TikTok, Reels or your shop page. If a tool can do all of that, you save clicks and keep focus on your product story.
Does the app let you drop a single image and spin a quick video? Many ecommerce owners love that shortcut because it means no extra filming. A quick check for a free trial or a money‑back promise also helps you test the AI before you commit.
Two solid options to explore are Bamu and Gem Designs Pro. Both offer auto‑cut and caption features that line up with an ai video editing tutorial workflow. Bamu leans toward fast batch processing, while Gem Designs Pro adds a few extra style filters that work well for product showcases.
Take a short test clip of your latest gadget. Upload it, watch the AI suggest three cut points, then pick the one that shows the product in action best. If the tool lets you tweak the colour in a single click, you’re ready to post.
Check the pricing page before you sign up. Some services charge per minute, others offer a flat monthly fee. Pick the model that fits how often you post new product clips. A low‑cost plan works fine if you only need a few videos a month.
Finally, note the export options. Look for MP4, MOV or a direct share button to Instagram. When the format matches where you sell, you skip the extra conversion step.
With the right editor in place, the rest of the ai video editing tutorial becomes a smooth ride. You’ll spend minutes, not hours, turning raw footage into scroll‑stopping clips.
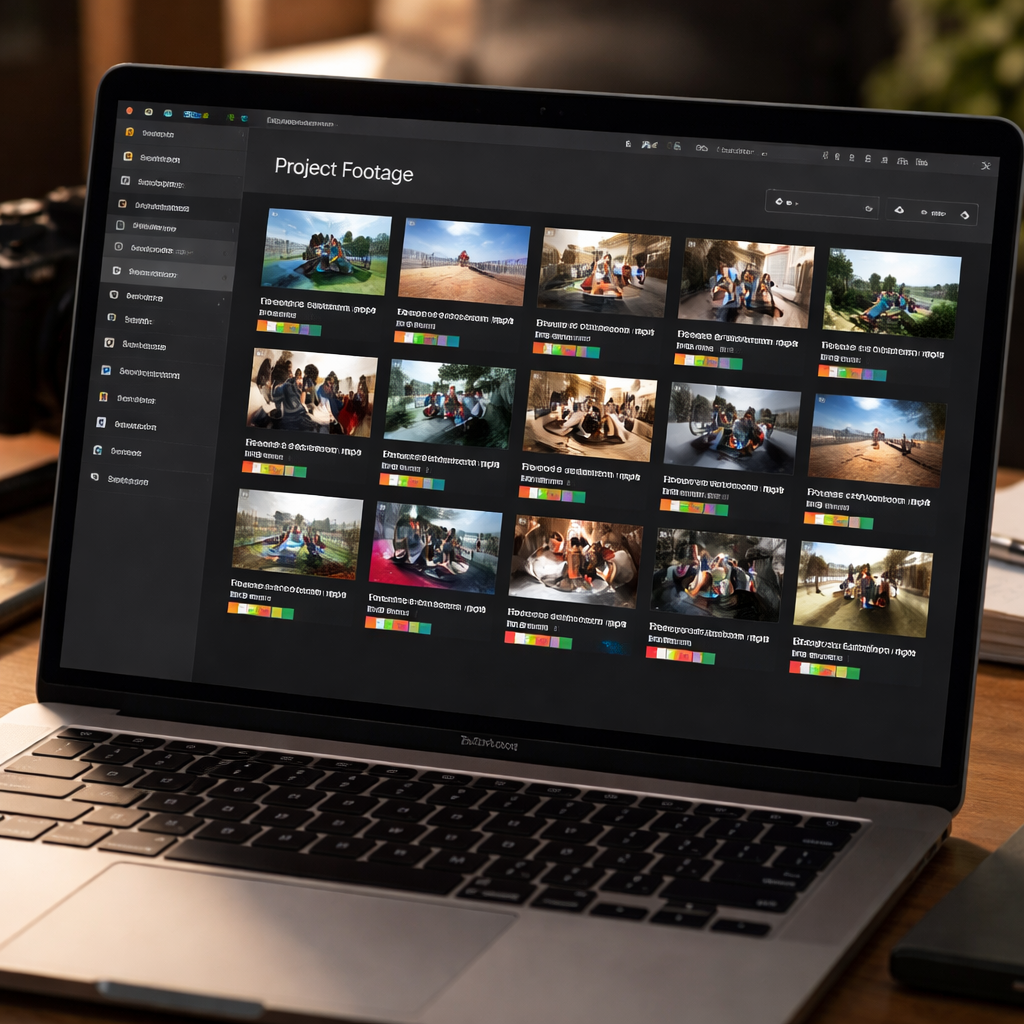
Step 2: Import and Organize Your Footage
First, drag your raw clips into the editor. Most tools let you drop a folder and they will list every file.
Give each file a clear name. If you shoot a coffee mug, call it "mug‑closeup.mp4" instead of "video1.mp4". This saves you from hunting later.
Next, sort the clips into folders that match your product story. One folder for "unboxing", another for "demo", a third for "lifestyle". You’ll see the folder names while you edit, so you can pull the right scene fast.
Tag and flag the best moments
Most AI editors let you add a quick tag or star to a clip. Click the star on the shot where the mug pours coffee. The AI will later suggest that part for a cut.
Tip: use a colour tag for "must keep". Red means you’ll definitely use it. Green can mean "nice but optional". This visual cue cuts down the edit time.
Now, set your project settings. Choose the resolution your shop needs: 1080p is safe for most sites. Pick the frame rate that matches your source footage, usually 30 fps.
When everything is named, sorted, and tagged, hit the import button. The editor will copy the files to its cloud workspace, so you can work from any computer.
After the upload finishes, open the timeline. You’ll see each folder as a separate track. Drag the starred clips onto the main track and the AI will propose cuts.
Need a quick reference? Check the Pocket Director AI video editor features page for how the tagging and folder view work.
Now you have a tidy library, clear tags, and the AI ready to cut. You’re set to move on to the auto‑cut step.
Step 3: Apply Automated Editing Features
Now the AI is ready to shape your video. You’ve got the clips in the timeline, so let the tool do the heavy work.
If you need a deeper look at how auto‑cut works, check the auto‑cut guide.
First up is auto‑cut. The editor scans each clip, spots motion and sound spikes, and suggests where a cut should land. You simply click “accept” on the parts you like or drag the handles to fine‑tune. If a jump feels off, pull the edge a frame left or right, the AI will keep the flow smooth.
Next, turn on auto‑caption. The AI reads the audio track, writes subtitles, and syncs them to the video. For product demos, double‑check that the brand name isn’t misspelled – a quick edit here saves you a re‑upload later.
Colour grading is the last automated step. The AI balances exposure, boosts contrast, and can add a warm tone that fits a cozy kitchen‑goods vibe. Pick a preset that matches your brand mood, then nudge the temperature slider a few degrees if you need a cooler feel.
Don’t forget the audio leveler. The AI can raise quiet speech and lower loud background noise in one click. Play the clip back; if a pop still rings, drag the volume line down just a notch. Clean sound makes the demo feel professional without a mic engineer.
Pick the right preset for the platform you target. For Instagram Reels, the AI suggests a square crop and a punchy colour boost. For a product page, choose a wider 16:9 frame and a softer tone that lets the item shine.
Run through the table below to see what each feature offers and a fast tip to get the best result.
| Feature | What it does | Tip |
|---|---|---|
| Auto‑cut | Finds the best moments and trims out the rest | Review the first cut and keep any missed bits |
| Auto‑caption | Creates text for spoken parts | Check spelling for product names |
| AI colour grading | Adjusts light and colour for a clean look | Use a neutral preset then tweak the brand hue |
When you’re happy with the cuts, captions and colours, hit export. The file will download in the size you set earlier, ready to pop on your product page or social feed.
That’s the whole automated edit, simple, fast, and all done from your browser.
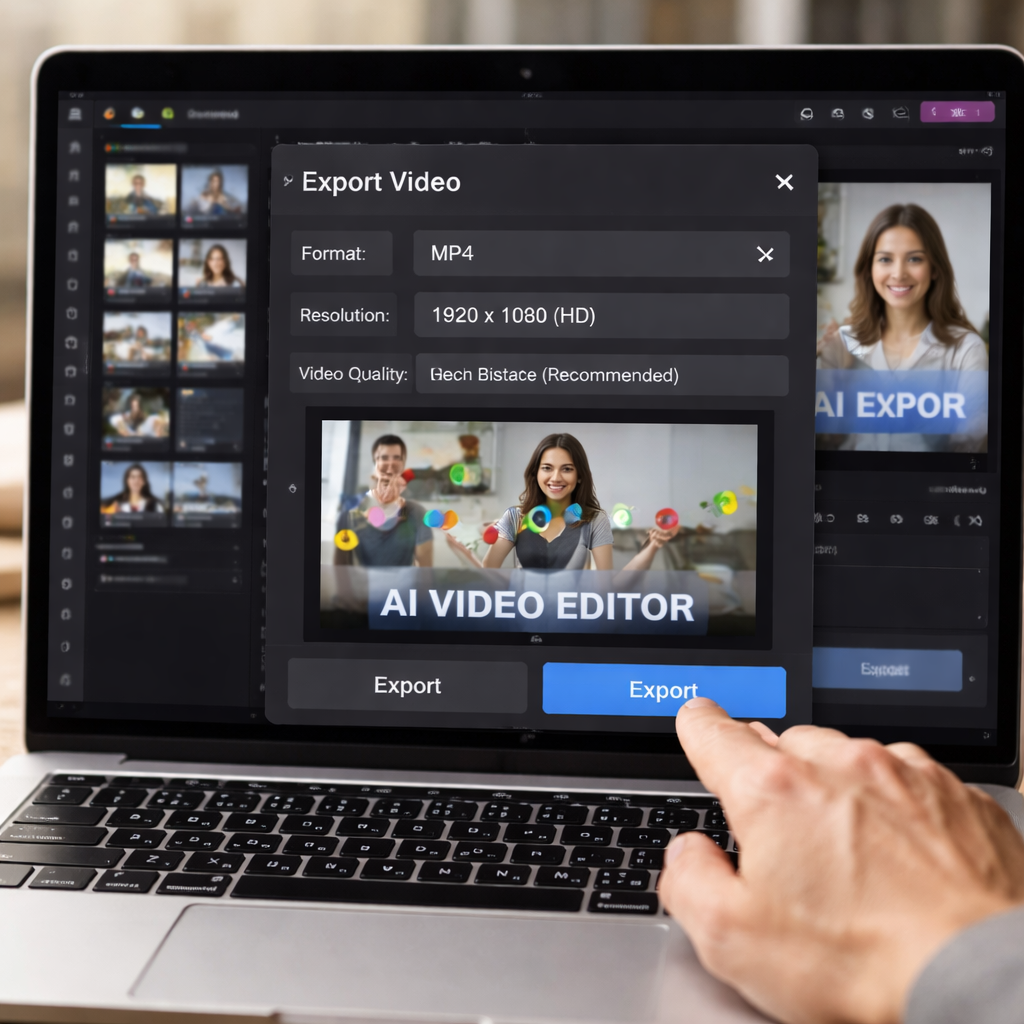
Step 4: Export and Share Your Final Video
Now that your cut, captions and colour look good, it’s time to pull the final file together.
Hit the Export button. The editor will render the video in the size you chose – 1080p for most product pages, 720p for quick social posts.
Before you click download, double‑check two settings: the format (MP4 works everywhere) and the bitrate (keep it high enough for crisp detail but low enough to load fast).
A quick tip: set the bitrate to around 8 Mbps for 1080p; it balances quality and file size.
Once the file is ready, the browser will save it to your Downloads folder. Open the file to give it a final once‑over – watch the sound, make sure the captions stay synced, and confirm the logo sits where you expect.
If anything looks off, go back, adjust the export preset, and re‑export. A few seconds of re‑rendering beats a blurry or out‑of‑sync clip on your shop.
Now you can share the video where it matters most. Upload straight to your e‑commerce platform, drop it into a product page, or push it to Instagram Reels.
For social, add a short hook in the caption – something like “See this gadget in action in 30 seconds”. Tag the right audience and schedule the post for peak traffic.
If you want to embed the clip on your site, copy the MP4 URL or use the platform’s embed code. Most sites let you set autoplay off, so visitors can click play when they’re ready.
For a quick walk‑through of colour tweaks, check the AI color grading tutorial.
A final checklist keeps you from missing a step: file name includes the product and version, thumbnail shows the most eye‑catching frame, and you’ve turned on closed captions for accessibility.
That’s it – export, give it one last glance, and hit publish. Your polished video is now ready to drive clicks and sales without any extra editing hassle.
FAQ
How does an AI video editing tutorial help me create product videos faster?
An AI video editing tutorial walks you through a ready‑made flow. You drop a raw clip in, let the AI trim, colour‑balance, and add captions in a few clicks. That cuts out manual cutting, frame‑by‑frame tweaks, and endless export settings. For a solo founder, the whole process can shrink from an hour to under ten minutes, letting you focus on the story instead of the tech.
What kind of footage should I upload before using the AI editor?
Start with clear, well‑lit shots of your product. A steady phone video or a short DSLR clip works fine. Keep the background simple so the AI can spot the item easily. If you have multiple angles, name each file with the view – “front”, “side”, “in‑use”. That way the tool can pull the right piece when it auto‑cuts for a TikTok short or a Instagram Reel.
Can I trust the auto‑cut feature to pick the right moments for my product demo?
The AI editor looks for changes in motion, sound spikes, and visual focus. It usually lands on the parts where the product moves or a voice line starts. You still get a preview, so you can nudge a cut a second forward or back. In practice, you’ll find the AI gets the bulk right, and you only fine‑tune a few spots.
How do I add captions without spending hours on typing?
The auto‑caption tool reads the audio track and creates text in sync. You just pick a font style and colour that match your brand. After the AI generates the lines, skim them for any mis‑heard words and edit those few spots. That slice of work takes seconds instead of minutes, and the captions keep your video watchable on silent feeds.
What export formats work best for Instagram Reels and TikTok?
Both platforms love MP4 files with H.264 encoding. Choose a vertical 9:16 preset for Reels and TikTok, and set the resolution to 1080 × 1920. The AI editor usually offers a one‑click “TikTok” or “Reels” preset that handles the size, bitrate, and file type. Using the right preset saves you from a separate conversion step later.
Is it safe to share my raw product clips with an online AI tool?
Reputable AI video editors use encrypted connections and delete files after processing. Look for a privacy policy that says they don’t store your footage long‑term. If you’re extra cautious, upload a watermarked version or a copy without sensitive background details. In most cases, the convenience outweighs the small risk, especially when you need fast content for a launch.
Conclusion
You've seen how an ai video editing tutorial can turn a raw product clip into a ready‑to‑post ad in minutes. The auto‑cut, smart‑color, and auto‑caption features let you skip the grunt work and focus on the story you want to tell.
Now it’s time to put it to use. Grab a product video, run it through the editor, pick the TikTok or Reels preset, and hit export. In under ten minutes you’ll have a short that looks polished and talks directly to your shoppers.
Got a fresh idea? Try swapping the font colour or adding a quick call‑to‑action overlay. Small tweaks can make your clip stand out in a crowded feed. Keep testing, keep sharing, and let the AI do the heavy lifting so you can grow your store faster.